Teachers juggle multiple resources and tasks throughout the instructional day, so any bit of relief they can get is a big help. There is a great multitude of apps, systems, and guides at their disposal, most of them - a crucial part of the curriculum. Below are a few tips on how to optimize and organize these seemingly unruly resources.
MacBook - or The Curse of Tabs
You open one app to do one thing, then another to do another, then a browser, then several more... And guess what? They're all staying because you still need them while you're working with the class or whipping up a presentation or conducting research. Fear not: Apple computers come with some nifty features to keep your virtual workspace under control. One of such features is called "Spaces" - that's like having multiple screens but all in one! Every time you open an app or a window in full screen, it creates a Space. Each Space can combine up to two different application windows. For example: Chrome and Preview. And each application can have any number of tabs you want. Additionally, the same application can be split into separate windows that can then be turned into separate Spaces by opening them in full screen mode. This way you can have all of your Science related tabs in one Chrome Space, and all of your YouTube channel tabs in the other Chrome Space, and your Clever Portal in the third. To learn about Spaces from the creators of all things Apple, check out this article: link.
To create a Google Chrome Space (any app will work exactly the same):
- Launch Chrome
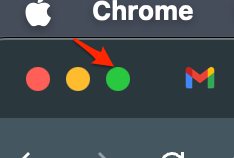
- Set it into full screen mode by clicking on the green circle at the top-left of the window

That's it - it has become a Space! To go back to your Desktop, place three fingertips on the trackpad and swipe to the right. To create another Space with Chrome, right-click or two-finger-click on Chrome icon in the Dock and select "New Window", then follow instructions in step 2. Alternatively, you can open another window by placing your cursor at the very top of the screen while in the first Chrome Space (to make the taskbar pop out), click File > New Window. Or simply press Command+N keys together while in Chrome.
Switching between Spaces is a piece of cake! Each MacBook that has a trackpad is equipped with default Gestures that improve productivity. Gestures is what allows you to zoom in and out of screens with two fingers, swipe across the screen, double-tap, and so on. To quickly access all of your Spaces, simply place three fingers on your trackpad and swipe up. Then select the Space you want to view. You can also add blank Spaces by clicking that "+" button at the top-right of the Space ribbon while in the Spaces view. To "scroll" between Spaces, swipe left and right with three fingers (it's like scrolling but sideways).
Spaces make it super simple to switch from one app/screen to another without moving a bunch of windows on your Desktop. One of the applications of Spaces in your classroom could be creating a Space for each period with customized tabs and apps. Another - to pre-open a set of videos each in its own Space, and then play them all in sequence by swiping between Spaces. You know - instead of clicking on links and waiting for them to open.

Clever Portal: Teacher Pages
Let's talk about the main Single Sign-On hub for curriculum applications - the Clever Portal. Teachers have several extra features in their Portal that other user types do not have. One of such features is Teacher Pages. Here, teachers can collect all resources and apps into one place for their students to access - even if students already have access to these apps from the District Page. Clever did a great job of creating this amazing article for teachers on how to get started and rule the instructional time with Teacher Pages. The section on organizing pages is an absolute gem!

Organize resources for students with Teacher Pages
Clever Portal: Help Center
From your Clever Portal, navigate to Support → Help Center. A new window will open with support articles tailored just for teachers! The nicest thing about it is that Clever will not overwhelm you with dozens of generic articles - they have organized their resources for teachers in a straightforward and easy to follow way, so it won't take too much time!
Clever Portal: A Step Further
Ever wondered what this "Clever Academy" is and whether it's relevant to your daily tasks? Dive into interactive walkthroughs in Clever Academy (accessed from Support menu) to learn more about the Clever Teacher Portal and get inspired.